Khái niệm
Các dịch vụ Android được thiết kế để thực thi các tác vụ có thời gian thực thi dài, như tải một tập tin từ Internet, nhưng không yêu cầu giao diện người dùng. Các dịch vụ Android chẳng qua là các tiến trình (processes). (xem tại https://ngocminhtran.com/2018/07/29/chu-ky-song-cua-ung-dung-android-va-activity/ )
Có 3 kiểu dịch vụ Android là: các dịch vụ bắt đầu (started services), các dịch vụ kết buộc (bound services) và các dịch vụ Intent (xem lại Intent tại https://ngocminhtran.com/2018/11/05/doi-tuong-intent-trong-android-phan-1/ )
Các dịch vụ bắt đầu (started services)
Một dịch vụ bắt đầu được kích hoạt bởi một thành phần ứng dụng khác, như một activity hay một broadcast receiver (xem lại tại https://ngocminhtran.com/2018/07/29/cac-thanh-phan-co-ban-cua-ung-dung-android/ ), và chạy cho đến khi được dừng hoặc bị hủy bởi Android Runtime để giải phóng tài nguyên. Dịch vụ này sẽ tiếp tục chạy nếu thành phần bắt đầu nó trong trạng thái foreground (trạng thái ưu tiên cao nhất) hay ngay cả thành phần bắt đầu dịch vụ này bị hủy.
Một dịch vụ sẽ chạy cùng với một tiểu trình chính (main thread) từ thành phần ứng dụng kích hoạt nó. Dịch vụ kiểu này được xem như là dịch vụ cục bộ (local service). Nếu muốn thực thi một dịch vụ trong một tiến trình riêng biệt (với tiểu trình chính) thì đòi hỏi phải khai báo trong tập tin manifest. Dịch vụ kiểu này gọi là dịch vụ từ xa (remote service).
Trừ khi được khai báo là riêng tư trong tập tin manifest, các dịch vụ có thể được kích hoạt bởi các thành phần ứng dụng khác trên cùng thiết bị Android thông qua cơ chế Intent (https://ngocminhtran.com/2018/11/05/doi-tuong-intent-trong-android-phan-1/ ).
Các dịch vụ bắt đầu được kích hoạt bằng cách gọi phương thức startService() và nó có thể tự dừng thực thi bằng cách gọi stopService().
Các dịch vụ Intent (Intent services)
Như đã đề cập ở trên, một dịch vụ sẽ bắt đầu song song với một tiểu trình chính như là thành phần kích hoạt nó. Vì vậy, bất kỳ một tác vụ nào cần thực thi bởi dịch vụ này sẽ phải bắt đầu với một tiểu trình mới để tránh ảnh hưởng đến việc thực thi của ứng dụng.
Lớp InentService dùng để thiết lập một tiến trình thực thi (worker thread) để xử lý các tác vụ mức background và xử lý yêu cầu theo cơ chế không đồng bộ (asynchronous). Phương thức thực hiện các nhiệm vụ này là onHandleIntent().
Đối với các dịch vụ thực thi theo cơ chế đồng bộ, cần sử dụng các lớp con của lớp Service một cách phù hợp để thực thi và quản lý tài nguyên một cách hiệu quả.
Các dịch vụ kết buộc (Bound services)
Các dịch vụ kết buộc giống với các dịch vụ bắt đẩu nhưng có một khác biệt. Các dịch vụ bắt đầu không trả về một kết quả và cũng không cho phép tương tác với thành phần ứng dụng kích hoạt nó; trong khi đó, các dịch vụ kết buộc cho phép tương tác và trả về kết quả đến thành phần ứng dụng kích hoạt nó. Cơ chế cho phép điều này gọi là cơ chế thực thi giao tiếp đa tiến trình (IPC – the Implementation of interprocess communication).
Một thành phần ứng dụng bắt đầu và kết buộc với một dịch vụ kết buộc thông qua phương thức bindService(). Nhiều thành phần có thể kết buộc đến dịch vụ cùng lúc. Dịch vụ có thể giải phóng ràng buộc với thành phần ứng dụng bằng cách dùng phương thức unbindSevice(). Khi thành phần cuối cùng (nếu có nhiều thành phần) kết buộc đến dịch vụ được giải phóng ràng buộc, dịch vụ sẽ được tắt bởi hệ thống Android Runtime.
Một dịch vụ kết buộc phải luôn thực thi phương thức onBind() với mục đích trả về một đối tượng kiểu IBinder đến các thành phần kết buộc đến dịch vụ. Đối tượng này chứa các thông tin từ việc giao tiếp giữa các thành phần ứng dụng và dịch vụ.
Các phương thức quan trọng khi làm việc với dịch vụ
Một dịch vụ phải được tạo như là một lớp con của lớp Service (ví dụ android.app.Service…) hay một lớp nào đó (ví dụ android.app.IntentService). Các phương thức được gọi từ dịch vụ phải được khai báo lại (overridden) từ các phương thức của lớp cha (superclass). Một số phương thức cơ bản sau:
- onStartCommand(): Phương thức này được gọi khi dịch vụ được bắt đầu bởi một thành phần ứng dụng khác bằng phương thức startService(). Phương thức này không cần thực thi với các dịch vụ kết buộc.
- onBind(): Được gọi khi một thành phần ứng dụng kết buộc đến một dịch vụ thông qua gọi phương thức bindService(). Phương thức này trả về một đối tượng kiểu IBinder đến thành phần ứng dụng chứa thông tin giao tiếp giữa thành phần ứng dụng đang kết buộc với dịch vụ và dịch vụ đó. Đối với các dịch vụ bắt đầu, phương thức này trả về giá trị NULL.
- onCreate(): Là vị trí khởi động của các tác vụ. Phương thức này sẽ được gọi trước khi gọi onStartCommand() hay lần gọi đầu tiên của phương thức onBind().
- onDestroy(): Gọi khi dịch vụ đang bị hủy.
- onHandleIntent(): Áp dụng cho các lớp con của lớp IntentService, được gọi để xử lý tiến trình cho dịch vụ. Nó thực thi trong một tiểu trình riêng biệt với ứng dụng chính.
Cũng cần chú ý rằng, lớp IntentService chứa các thực thi các phương thức onStartCommand() và onBind() cho chính nó nên không cần thực thi trong các lớp con.
Các tùy chọn hủy một dịch vụ
Khi một dịch vụ bị hủy bởi hệ thống Android runtime, phương thức onStartCommand() sẽ trả về các giá trị sau:
- START_NOT_STICKY: Xác nhận một dịch vụ sẽ không bắt đầu lại khi bị hủy trừ khi có các intents đang chờ sẵn để thi hành.
- START_STICKY: Xác nhận một dịch vụ sẽ bắt đầu lại sớm nhất có thể sau khi bị hủy nếu việc hủy dịch vụ thực hiện sau khi phương thức onStartCommand() được trả về. Ngay cả khi không có intent nào đang chờ sẵn, phương thức onStartCommand() được gọi sẽ trả về giá trị intent là NULL. Intent đang được xử lý tại thời điểm dịch vụ bị hủy được bỏ qua.
- START_REDELIVER_INTENT: Xác nhận rằng, nếu dịch vụ bị hủy sau khi phương thức onStartCommand() trả về, dịch vụ có thể được bắt đầu lại với intent hiện tại được thi hành lại trong số các intens đang chờ sẵn.
Khai báo một dịch vụ trong tập tin manifest
Để khai báo một dịch vụ trong tập tin manifest chúng ta dùng phần từ <service> đặt trong phần từ <application> như ví dụ sau:
<application

   android:icon="@mipmap/ic_launcher"

   android:label="@string/app_name" >

   <activity

      android:label="@string/app_name"

      android:name=".TestActivity" >

      <intent-filter>

        <action android:name="android.intent.action.MAIN" />

        <category android:name="android.intent.category.LAUNCHER" />

      </intent-filter>

  </activity>

  <service android:name="MyService>

  </service>

</application>
Mặc định, các dịch vụ được khai báo kiểu public và các thành phần khác bên ngoài package của ứng dụng có thể truy cập. Muốn khai báo dịch vụ riêng tư (kiểu private), chúng ta dùng thuộc tính android:exported với giá trị là false như sau:
<service android:name="MyService"

         android:exported="false">

</service>
Cũng mặc định, các dịch vụ sẽ chạy với cùng tiến trình với vai trò là thành phần ứng dụng kích hoạt dịch vụ. Nếu chúng ta muốn dịch vụ chạy với tiến trình của riêng nó, có thể dùng thuộc tính android:process như ví dụ:
<service android:name="MyService"

         android:exported="false"

         android:process=":myprocess">

</service>
Tiến trình của dịch vụ MyService có tên myprocess và tên tiến trình phải bắt đầu bằng ký tự thường hay dấu hai chấm. Chúng ta khai báo với dấu hai chấm trước tên tiến trình để xác nhận rằng tiến trình này là cục bộ hay riêng tư của ứng dụng; nếu không có dấu hai chấm, tiến trình này là public và có thể can thiệp bởi các thành phần khác ngoài gói ứng dụng.
Các dịch vụ có thể thi hành trên các ứng dụng khác trên thiết bị bằng cách dùng cùng cơ chế lọc như intent. Khi một hệ thống Android khởi động lần đầu, một dịch vụ được khởi động thông qua broadcast receiver với một bộ lọc intent được cấu hình kiểu android.intent.action.BOOT_COMPLETED. Khi intent được phát hiện, broadcast receiver sẽ gọi dịch vụ yêu cầu.
Minh họa thực thi ứng dụng với dịch vụ bắt đầu (Started Service)
Tạo một ứng dụng Android mới tên ServiceExampleActivity và khi ứng dụng khởi tạo chúng ta sẽ có hai tập tin là activity_main.xml và MainActivity.java. Gói ứng dụng là com.ngocminhtran.serviceexampleactivity.
Thêm một lớp mới đến ứng dụng bằng cách vào app > java, chọn gói ứng dụng, ví dụ com.ngocminhtran.serviceexampleactivity, và nhấn chuột phải vào gói này chọn New > Java Class. Trong hộp thoại Create New Class gõ tên lớp trong Name là MyIntentService:
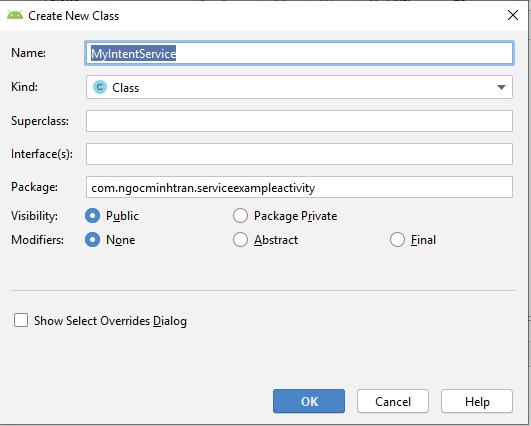
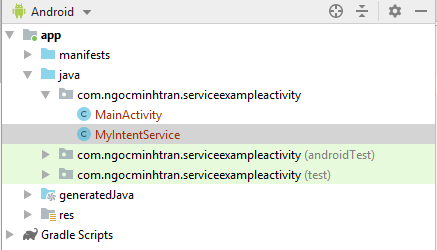
Và nhấn OK. Như vậy lúc này chúng ta có hai lớp là MainActivity và MyIntentService:
Nội dung mặc định lớp MyIntentService trong tập tin MyIntentService.java như sau:
package com.ngocminhtran.serviceexampleactivity;

public class MyIntentService {

}
Thay đổi nội dung trong tập tin MyIntentService lại như sau:
package com.ngocminhtran.serviceexampleactivity;
import android.app.IntentService;
import android.content.Intent;
public class MyIntentService extends IntentService{
  @Override
  protected void onHandleIntent(Intent arg0) {
  }
  public MyIntentService() {
    super("MyIntentService");
  }
}
Trong thực tế, phương thức onHandleIntent() thực thi một số nhiệm vụ như nhận thời gian tải một tập tin video hay audio lớn từ Internet. Trong ứng dụng minh họa này, chúng ta chỉ đơn giản muốn phương thức này hiển thị thông điệp ra màn hình, cụ thể là cửa sổ Logcat thông qua phương thức Log:
private static final String TAG = "ServiceExample";
@Override
protected void onHandleIntent(Intent arg0) {
    Log.(TAG, "Intent Service started");
}
public MyIntentService() {
    super("MyIntentService");
}
Kế tiếp là khai báo dịch vụ đến tập tin manifest bằng cách mở tập tin AndroidManifest.xml trong thư mục manifests:
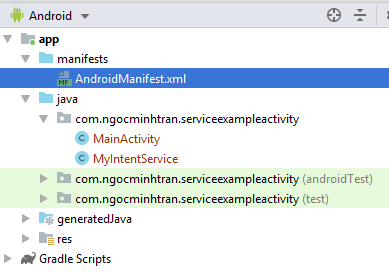
Thêm phần tử <service> đặt dưới <activity> trong phần tử <application>:
<application
    android:allowBackup="true"
    android:icon="@mipmap/ic_launcher"
    android:label="@string/app_name"
    android:roundIcon="@mipmap/ic_launcher_round"
    android:supportsRtl="true"
    android:theme="@style/AppTheme">
    <activity android:name=".MainActivity">
      <intent-filter>
         <action android:name="android.intent.action.MAIN" />
         <category android:name="android.intent.category.LAUNCHER" />
      </intent-filter>
   </activity>
   <service android:name=".MyIntentService" />
</application>
Ở đây, chúng ta thêm dịch vụ dưới dạng tên lớp với sự xuất hiện của dấu chấm. Và bây giờ, chúng ta sẽ khởi động dịch vụ dùng đối tượng Intent và phương thức startService() bằng cách mở tập tin MainActivity.java
package com.ngocminhtran.serviceexampleactivity;

import android.support.v7.app.AppCompatActivity;
import android.os.Bundle;
import android.content.Intent;
public class MainActivity extends AppCompatActivity {

   @Override
   protected void onCreate(Bundle savedInstanceState) {
       super.onCreate(savedInstanceState);
       setContentView(R.layout.activity_main);
       Intent intent = new Intent(this, MyIntentService.class);
       startService(intent);
   }
}
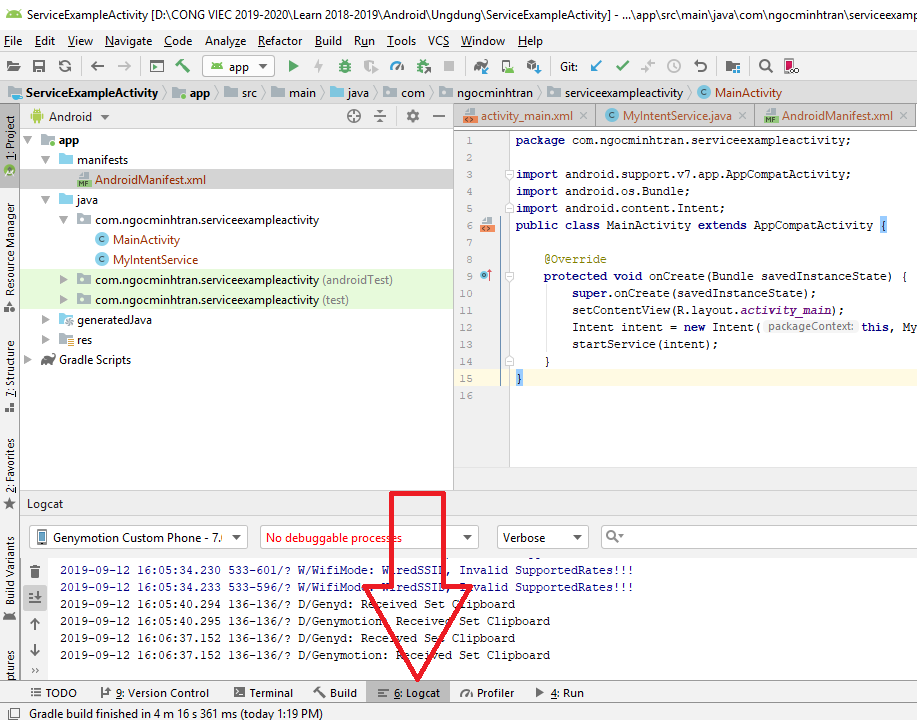
Cuối cùng, chúng ta sẽ kiểm tra dịch vụ vừa tạo trong cửa sổ Logcat như sau:
– Mở cửa sổ Logcat bằng cách nhấn vào mục Logcat
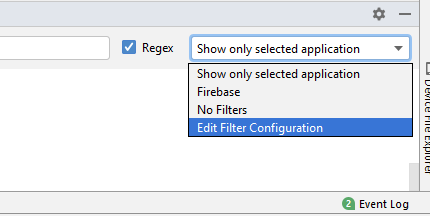
– Bên phải cửa sổ Logcat tại mục Show only selected application chọn Edit Filter Configuration:
– Trong cửa sổ Create New Logcat Filter nhập ServiceExample trong mục Filter Name và nhập giá trị chuỗi TAG trong mục Log Tag (tức ServiceExample):
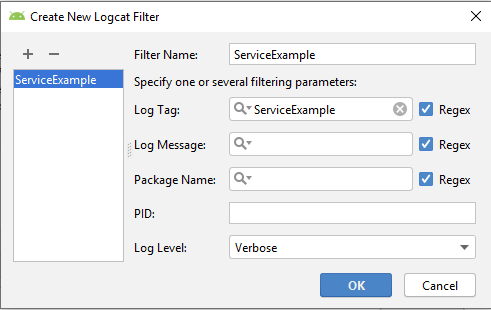
Nhấn OK. Bây giờ thực thi ứng dụng với thiết bị ảo hay Genymotion. Kết quả trong cửa sổ Logcat:
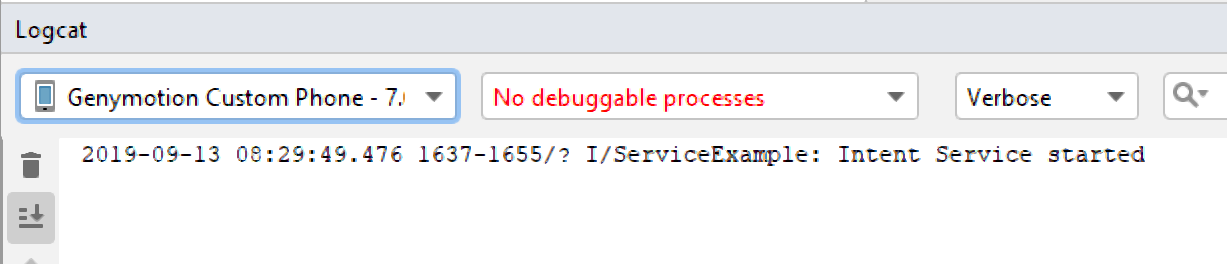
Dịch vụ MyIntentService được khai báo và chạy cùng với tiểu trình chính trong ứng dụng của chúng ta. Kế tiếp, chúng ta sẽ tạo một dịch vụ mới và thực thi cùng với một tiểu trình mới.
Thêm một lớp con của lớp Service đến dự án ServiceExampleActivity bằng cách nhấn chuột phải vào com.ngocminhtran.serviceexampleactivity trong app > java và chọn New > Service > Service. Trong hộp thoại New Android Component giữ nguyên các tùy chọn và tên lớp (Class Name) như sau:
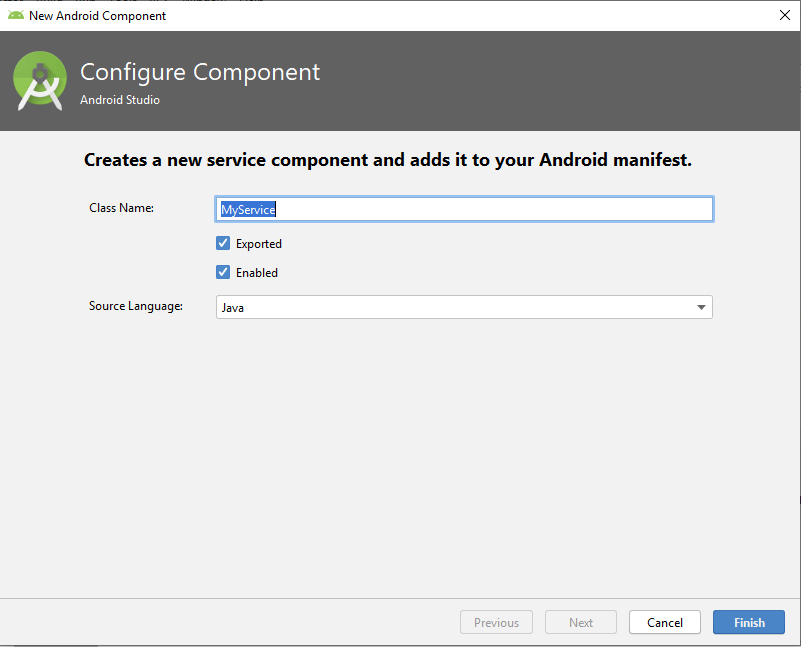
Nhấn Finish. Lớp MyService như sau:
package com.ngocminhtran.serviceexampleactivity;

import android.app.Service;
import android.content.Intent;
import android.os.IBinder;

public class MyService extends Service {
   public MyService() {
   }

   @Override
   public IBinder onBind(Intent intent) {
      //TODO: Return the communication channel to the service.
      throw new UnsupportedOperationException("Not yet implemented");
   }
}
Thay đổi nội dung lại như sau:
package com.ngocminhtran.serviceexampleactivity;

import android.app.Service;
import android.content.Intent;
import android.os.IBinder;
import android.util.Log;
public class MyService extends Service {
  public MyService() {
  }

  private static final String TAG = "ServiceExample";
  @Override
  public void onCreate() {
    Log.i(TAG, "Service onCreate");
  }
  @Override
  public int onStartCommand(Intent intent, int flags, int startId)
  {
    Log.i(TAG, "Service onStartCommand " + startId);
    int i = 0;
    while (i <= 3) {
       try {
            Thread.sleep(10000);
            i++;
       } catch (Exception e) {
       }
       Log.i(TAG, "Service running");
    }
   return Service.START_STICKY;
  }
  @Override
  public IBinder onBind(Intent arg0) {
    Log.i(TAG, "Service onBind");
    return null;
  }
  @Override
  public void onDestroy() {
    Log.i(TAG, "Service onDestroy");
  }
}
Phương thức onBind() phải trả về giá trị null để xác nhận với hệ thống Android đây không phải là một dịch vụ kết buộc (bound service). Phương thức bắt đầu dịch vụ onStartCommand() cũng được gọi bên cạnh phương thức khởi tạo onCreate() và phương thức hủy onDestroy().
Dịch vụ MyService của chúng ta đã được tự động thêm vào tập tin AndroidManifest.xml như sau:
<service
android:name=".MyService"
android:enabled="true"
android:exported="true"></service>
Kế tiếp, thay đổi lại nội dung trong tập tin MainActivity.java bằng cách xóa (hay che) đi hai lệnh khởi tạo và thực thi dịch vụ MyIntentService và thêm vào phương thức buttonClick thực hiện chức năng khởi tạo và thực thi dịch vụ MyService như sau:
package com.ngocminhtran.serviceexampleactivity;

import android.support.v7.app.AppCompatActivity;
import android.os.Bundle;
import android.content.Intent;
import android.view.View;

public class MainActivity extends AppCompatActivity {

   @Override
   protected void onCreate(Bundle savedInstanceState) {
       super.onCreate(savedInstanceState);
       setContentView(R.layout.activity_main);
       // Intent intent = new Intent(this, MyIntentService.class);
       //startService(intent);
    }
    public void buttonClick(View view)
    {
      Intent intent = new Intent(this, MyService.class);
      startService(intent);
    }
}
Mở tập tin activity_main.xml, xóa TextView mặc định và thêm một Button với thuộc tính Text là Start Service và giá trị thuộc tính onClick là phương thức buttonClick:
<Button
   android:id="@+id/button"
   android:layout_width="wrap_content"
   android:layout_height="wrap_content"
   android:layout_marginStart="8dp"
   android:layout_marginLeft="8dp"
   android:layout_marginTop="8dp"
   android:text="Start Service"
   android:onClick="buttonClick"
   app:layout_constraintBottom_toBottomOf="parent"
   app:layout_constraintEnd_toEndOf="parent"
   app:layout_constraintStart_toStartOf="parent"
   app:layout_constraintTop_toTopOf="parent" />
Lưu và thực thi ứng dụng. Nhấn nút Start Service và xem kết quả thực thi trong cửa sổ Logcat. Nếu trước khi thông điệp cuối cùng xuất hiện, chúng ta nhấn nút Start Service lần hai thì một cảnh báo như sau:
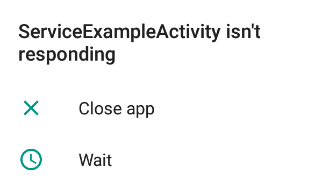
Nguyên nhân là do tiến trình chính của ứng dụng đang nắm giữ dịch vụ khi nó thực thi lệnh lặp và ngăn chặn mọi sự can thiệp làm gián đoạn. Giải pháp cho vấn đề này là tạo một tiểu trình mới tách biệt với tiểu trình chính bằng cách dùng đối tượng AsyncTask (xem lại bài https://ngocminhtran.com/2019/05/16/cac-tieu-trinh-threads-va-lop-asynctask-trong-android/ ).
Thêm một lớp mới thừa kế từ lớp AsyncTask tên SrvTask đến lớp MyService và thay đổi nội dung trong phương thức onStartCommand trong tập tin MyServive.java:
package com.ngocminhtran.serviceexampleactivity;

import android.app.Service;
import android.content.Intent;
import android.os.AsyncTask;
import android.os.IBinder;
import android.util.Log;
public class MyService extends Service {
   public MyService() {
   }

   private static final String TAG = "ServiceExample";
   @Override
   public void onCreate() {
       Log.i(TAG, "Service onCreate");
   }
   @Override
   public int onStartCommand(Intent intent, int flags, int startId)
   {
     AsyncTask task = new SrvTask().executeOnExecutor(
     AsyncTask.THREAD_POOL_EXECUTOR, startId);
     return Service.START_STICKY;
   }
   @Override
   public IBinder onBind(Intent arg0) {
     Log.i(TAG, "Service onBind");
     return null;
    }
   @Override
   public void onDestroy() {
    Log.i(TAG, "Service onDestroy");
   }
   private class SrvTask extends AsyncTask<Integer, Integer, String> {
      @Override
      protected String doInBackground(Integer... params) {
        int startId = params[0];
        int i = 0;
        while (i <= 3) {
          publishProgress(params[0]);
          try {
            Thread.sleep(10000);
            i++;
           } catch (Exception e) {
          }
        }
      return("Service complete " + startId);
    }
    @Override
    protected void onPostExecute(String result) {
       Log.i(TAG, result);
    }
    @Override
    protected void onPreExecute() {
    }
    @Override
    protected void onProgressUpdate(Integer... values) {
       Log.i(TAG, "Service Running " + values[0]);
    }
  }
}
Thực thi lại ứng dụng. Lúc này chúng ta có thể nhấn nút Start Service nhiều lần mà không gặp cảnh báo gì. Một kết quả trong Logcat có thể như sau:
2019-09-13 10:20:10.442 1629-1629/com.ngocminhtran.serviceexampleactivity I/ServiceExample: Service Running 1

2019-09-13 10:20:20.435 1629-1629/com.ngocminhtran.serviceexampleactivity I/ServiceExample: Service Running 1

2019-09-13 10:20:22.810 1629-1629/com.ngocminhtran.serviceexampleactivity I/ServiceExample: Service Running 2

2019-09-13 10:20:26.883 1629-1629/com.ngocminhtran.serviceexampleactivity I/ServiceExample: Service Running 3

2019-09-13 10:20:30.439 1629-1629/com.ngocminhtran.serviceexampleactivity I/ServiceExample: Service Running 1

2019-09-13 10:20:32.802 1629-1629/com.ngocminhtran.serviceexampleactivity I/ServiceExample: Service Running 2
Minh họa thực thi ứng dụng với dịch vụ kết buộc cục bộ (Local Bound Service)
Tạo một ứng dụng Android mới tên LocalBoundService và khi ứng dụng khởi tạo chúng ta sẽ có hai tập tin là activity_main.xml và MainActivity.java. Gói ứng dụng là com.ngocminhtran.localboundservice.
Thêm một dịch vụ kết buộc đến dự án bằng cách nhấn chuột phải vào gói ứng dụng com.ngocminhtran.localboundservice trong app > java và chọn New > Service > Service. Trong hộp thoại New Android Component gõ LocalBoundService trong mục Class Name và giữ nguyên các tùy chọn khác. Nhấn Finish. Lớp LocalBoundService vừa được tạo trong tập tin LocalBoundService trông như sau:
package com.ngocminhtran.localboundservice;

import android.app.Service;
import android.content.Intent;
import android.os.IBinder;

public class LocalBoundService extends Service {
  public LocalBoundService() {
  }

  @Override
  public IBinder onBind(Intent intent) {
     // TODO: Return the communication channel to the service.
     throw new UnsupportedOperationException("Not yet implemented");
  }
}
Vì các dịch vụ kết buộc cục bộ giao tiếp với các thành phần ứng dụng khác thông qua đối tượng Binder nên chúng ta sẽ thêm một lớp con của lớp Binder đến lớp LocalBoundService và khởi tạo đối tượng của lớp này:
package com.ngocminhtran.localboundservice;

import android.app.Service;
import android.content.Intent;
import android.os.Binder;
import android.os.IBinder;

public class LocalBoundService extends Service {

private final IBinder myBinder = new MyLocalBinder();
  public LocalBoundService() {
  }

  @Override
  public IBinder onBind(Intent intent) {
    // TODO: Return the communication channel to the service.
    throw new UnsupportedOperationException("Not yet implemented");
  }
  public class MyLocalBinder extends Binder {
    LocalBoundService getService() {
      return LocalBoundService.this;
    }
  }
}
Phương thức getService() sẽ trả về tham chiếu đến đối tượng LocalBoundService hiện tại (thể hiện qua từ khóa this).
Chúng ta đã khởi tạo một đối tượng Binder là myBinder và trong tham chiếu đến đối tượng này sẽ được trả về trong phương thức onBind(). Một phương thức getCurrentTime() trả về thời gian hiện tại đến các thành phần khác khi kết buộc đến dịch vụ sẽ được thêm vào lớp LocalBoundService:
package com.ngocminhtran.localboundservice;

import android.app.Service;
import android.content.Intent;
import android.os.Binder;
import android.os.IBinder;
import java.text.SimpleDateFormat;
import java.util.Date;
import java.util.Locale;

public class LocalBoundService extends Service {

  private final IBinder myBinder = new MyLocalBinder();
  public LocalBoundService() {
  }

  @Override
  public IBinder onBind(Intent intent) {
    return myBinder;
  }
  public String getCurrentTime() {
    SimpleDateFormat dateformat =
       new SimpleDateFormat("HH:mm:ss dd/MM/yyyy", Locale.US);
    return (dateformat.format(new Date()));
  }
  public class MyLocalBinder extends Binder {
    LocalBoundService getService() {
       return LocalBoundService.this;
  }
}
}
Bước cuối là khai báo dịch vụ đến tập tin AndroidManifest.xml:
<?xml version="1.0" encoding="utf-8"?>
<manifest xmlns:android="http://schemas.android.com/apk/res/android"
package="com.ngocminhtran.localboundservice">

<application
   android:allowBackup="true"
   android:icon="@mipmap/ic_launcher"
   android:label="@string/app_name"
   android:roundIcon="@mipmap/ic_launcher_round"
   android:supportsRtl="true"
   android:theme="@style/AppTheme">
   <service
     android:name=".LocalBoundService"
     android:enabled="true"
     android:exported="true"></service>

   <activity android:name=".MainActivity">
     <intent-filter>
        <action android:name="android.intent.action.MAIN" />
        <category android:name="android.intent.category.LAUNCHER" />
     </intent-filter>
   </activity>
   <service
     android:name=".LocalBoundService"
     android:enabled="true"
     android:exported="true" >
   </service>
  </application>

</manifest>
Như vậy chúng ta đã hoàn thành việc tạo và khai báo dịch vụ kết buộc cục bộ đến tập tin manifest. Bây giờ, chúng ta sẽ thực hiện kết buộc dịch vụ đến các thành phần của ứng dụng bằng cách sử dụng lớp ServiceConnection.
Khai báo một lớp con ServiceConnection trong lớp MainActivity trong tập tin MainActivity.java và thực thi các phương thức onServiceConnected() và onServiceDisconnected():
package com.ngocminhtran.localboundservice;

import android.support.v7.app.AppCompatActivity;
import android.os.Bundle;
import android.os.IBinder;
import android.content.Context;
import android.content.Intent;
import android.content.ComponentName;
import android.content.ServiceConnection;
import  com.ngocminhtran.localboundservice.LocalBoundService.MyLocalBinder;
public class MainActivity extends AppCompatActivity {
  LocalBoundService myService;
  boolean isBound = false;
  @Override
  protected void onCreate(Bundle savedInstanceState) {
     super.onCreate(savedInstanceState);
     setContentView(R.layout.activity_main);
  }
  private ServiceConnection myConnection = new ServiceConnection()
  {
    @Override
    public void onServiceConnected(ComponentName className, IBinder service) {
        MyLocalBinder binder = (MyLocalBinder) service;
        myService = binder.getService();
        isBound = true;
     }
     @Override
     public void onServiceDisconnected(ComponentName name) {
       isBound = false;
     }
  };
}
Phương thức onServiceConnected() được gọi khi kết nối giữa dịch vụ và thành phần ứng dụng thành công. Phương thức có hai tham số trong đó tham số thứ hai (kiểu IBinder) service chính là tham chiếu đến đối tượng Binder được trả về từ phương thức onBind(). Tham số này được ép đến kiểu MyLocalBinder và sau đó phương thức getService() sẽ nhận một tham chiếu của dịch vụ và gán đến biến myService. Biến cờ isBound xác nhận kết nối là thành công. Phương thức onServiceDisconnected() được gọi khi kết nối giữa dịch vụ và thành phần ứng kết thúc. Cờ isBound thể hiện kết nối kết thúc.
Chúng ta thực hiện việc kết buộc dịch vụ và các thành phần ứng dụng thông qua đối tượng Intent và phương thức bindService(). Thay đổi nội dung trong phương thức onCreate():
@Override
protected void onCreate(Bundle savedInstanceState) {
   super.onCreate(savedInstanceState);
   setContentView(R.layout.activity_main);
   Intent intent = new Intent(this, LocalBoundService.class);
   bindService(intent, myConnection, Context.BIND_AUTO_CREATE);
}
Trước khi hoàn tất, chúng ta cần thiết kế giao diện và viết vài dòng mã cho ứng dụng đóng vai trò là thành phần kết nối đến dịch vụ bằng cách mở tập tin activity_main.xml và thêm một Button với thuộc tính text là Show Time, giá trị thuộc tính onClick là showTime() (phương thức chúng ta sẽ định nghĩa trong bước kế tiếp) và thay đổi giá trị thuộc tính ID của TextView mặc định thành myTextView:
<TextView
  android:id="@+id/myTextView"
  android:layout_width="wrap_content"
  android:layout_height="wrap_content"
  android:text="Hello World!"
  app:layout_constraintBottom_toBottomOf="parent"
  app:layout_constraintLeft_toLeftOf="parent"
  app:layout_constraintRight_toRightOf="parent"
  app:layout_constraintTop_toTopOf="parent"
  app:layout_constraintVertical_bias="0.376" />

<Button
  android:id="@+id/button"
  android:layout_width="wrap_content"
  android:layout_height="wrap_content"
  android:layout_marginStart="8dp"
  android:layout_marginLeft="8dp"
  android:layout_marginTop="8dp"
  android:text="Show Time"
  android:onClick="showTime"
  app:layout_constraintBottom_toBottomOf="parent"
  app:layout_constraintEnd_toEndOf="parent"
  app:layout_constraintStart_toStartOf="parent"
  app:layout_constraintTop_toTopOf="parent" />
Trong tập tin MainActivity.java, thêm phương thức showTime():
...

import android.view.View;
import android.widget.TextView;

public class MainActivity extends AppCompatActivity {
  LocalBoundService myService;
  boolean isBound = false;
  public void showTime(View view)
  {
    String currentTime = myService.getCurrentTime();
    TextView myTextView =
        (TextView)findViewById(R.id.myTextView);
    myTextView.setText(currentTime);
  }
...

}
Lưu và thực thi ứng dụng. Khi nhấn nút Show Time sẽ gọi phương thức getCurrentTime từ dịch vụ và hiển thị thời gian hiện tại.
Minh họa thực thi ứng dụng với dịch vụ kết buộc từ xa (Remote Bound Service)
Các dịch vụ kết buộc cục bộ giao tiếp với các thành phần ứng dụng cục bộ thông qua đối tượng Binder trên cùng một tiến trình và điều này không khả thi đối với các dịch vụ chạy trên các tiến trình khác như các dịch vụ kết buộc từ xa. Các dịch vụ kết buộc từ xa thực hiện giao tiếp với các thành phần ứng dụng trong những tiến trình khác nhau thông qua các cấu hình Messenger và Handler. Các cấu hình này được tạo để cho phép các thông điệp được trao đổi qua lại giữa các thành phần ứng dụng và dịch vụ.
Tạo một ứng dụng Android mới tên RemoteBoundService và khi ứng dụng khởi tạo chúng ta sẽ có hai tập tin là activity_main.xml và MainActivity.java. Gói ứng dụng là com.ngocminhtran.remoteboundservice.
Thêm một dịch vụ kết buộc đến dự án bằng cách nhấn chuột phải vào gói ứng dụng com.ngocminhtran.remoteboundservice trong app > java và chọn New > Service > Service. Trong hộp thoại New Android Component gõ RemoteBoundService trong mục Class Name và giữ nguyên các tùy chọn khác. Nhấn Finish. Lớp RemoteBoundService vừa được tạo trong tập tin RemoteBoundService trông như sau:
package com.ngocminhtran.remoteboundservice;

import android.app.Service;
import android.content.Intent;
import android.os.IBinder;

public class RemoteBoundService extends Service {
  public RemoteBoundService() {
  }

  @Override
  public IBinder onBind(Intent intent) {
    // TODO: Return the communication channel to the service.
    throw new UnsupportedOperationException("Not yet implemented");
  }
}
Thêm một lớp con lớp Handler đến lớp RemoteBoundService:
package com.ngocminhtran.remoteboundservice;

import android.app.Service;
import android.content.Intent;
import android.os.IBinder;
import android.os.Bundle;
import android.os.Handler;

import android.os.Message;
import android.widget.Toast;
import android.os.Messenger;
public class RemoteBoundService extends Service {
  public RemoteBoundService() {
  }

  class IncomingHandler extends Handler {
     @Override
     public void handleMessage(Message msg) {
        Bundle data = msg.getData();
        String dataString = data.getString("MyString");
        Toast.makeText(getApplicationContext(),dataString, Toast.LENGTH_SHORT).show();
     }
  }
  @Override
  public IBinder onBind(Intent intent) {
     // TODO: Return the communication channel to the service.
    throw new UnsupportedOperationException("Not yet implemented");
  }
}
Lớp mới được thêm vào (IncomingHandler) thực thi phương thức handleMessage() khi xuất hiện một thông điệp được nhận từ một thành phần ứng dụng khác. Phương thức này chuyển một đối tượng Message như một tham số chứa dữ liệu mà thành phần ứng dụng muốn chuyển đến dịch vụ. Trong đoạn mã trên, đối tượng Message chứa một đối tượng kiểu Bundle chứa một chuỗi để hiển thị đến người dùng.
Sau khi khai báo lớp con lớp Handler, trong lớp RemoteBoundService, một đối tượng Messenger được khai báo và tham chiếu của đối tượng này được trả về bởi phương thức onBind() thông qua phương thức getBinder()
public class RemoteBoundService extends Service {

  final Messenger myMessenger = new Messenger(new IncomingHandler());
  public RemoteBoundService() {
  }

  ...

  @Override
  public IBinder onBind(Intent intent) {
    return myMessenger.getBinder();
  }
}
Dịch vụ RemoteBoundService đã được khai báo tự động trong tập tin manifest, tuy nhiên, chúng ta muốn dịch vụ này chạy trên một tiến trình riêng. Mở tập tin AndroidManifest.xml và thêm thuộc tính android:process đến phần tử <Service>:
<service
   android:name=".RemoteBoundService"
   android:enabled="true"
   android:exported="true"
   android:process=":my_process">
</service>
Với cách khai báo này, ứng dụng RemoteBoundService và dịch vụ (chúng ta đặt trùng tên) sẽ chạy trên các tiến trình khác nhau. Để kết buộc giữa ứng dụng và dịch vụ, chúng ta thực thi lớp ServiceConnection trong lớp MainActivity. Mở tập tin MainActivity.java và thay đổi như sau:
package com.ngocminhtran.remoteboundservice;

import android.support.v7.app.AppCompatActivity;
import android.os.Bundle;
import android.os.IBinder;
import android.os.Message;
import android.os.Messenger;
import android.os.RemoteException;
import android.content.ComponentName;
import android.content.Context;
import android.content.Intent;
import android.content.ServiceConnection;
import android.view.View;
public class MainActivity extends AppCompatActivity {

  Messenger myService = null;
  boolean isBound;
  @Override
  protected void onCreate(Bundle savedInstanceState) {
    super.onCreate(savedInstanceState);
    setContentView(R.layout.activity_main);
  }
  private ServiceConnection myConnection = new ServiceConnection() {
    public void onServiceConnected( ComponentName className, IBinder service) {
       myService = new Messenger(service);
       isBound = true;
    }
    public void onServiceDisconnected(
       ComponentName className) {
       myService = null;
       isBound = false;
    }
  };
}
Các phương thức onServiceConnected() và onServiceDisconnected() có ý nghĩa như đã mô tả trong ứng dụng minh họa LocalBoundService. Khai báo đối tượng Intent và gọi phương thức bindService() trong onCreate():
@Override
protected void onCreate(Bundle savedInstanceState) {
   super.onCreate(savedInstanceState);
   setContentView(R.layout.activity_main);
   Intent intent = new Intent(getApplicationContext(),
   RemoteBoundService.class);
   bindService(intent, myConnection, Context.BIND_AUTO_CREATE);
}
Trước khi thực hiện giao tiếp giữa dịch vụ và ứng dụng, chúng ta cần thay đổi một ít về giao diện người dùng bằng cách mở tập tin activity_main.xml, xóa TextView mặc định và thêm một Button với thuộc tính text là Send Message và giá trị thuộc tính onClick là sendMessage – một phương thức chúng ta sẽ định nghĩa trong bước kế tiếp:
<Button
  android:id="@+id/button"
  android:layout_width="wrap_content"
  android:layout_height="wrap_content"
  android:layout_marginStart="8dp"
  android:layout_marginLeft="8dp"
  android:layout_marginBottom="8dp"
  android:text="Send Message"
  android:onClick="sendMessage"
  app:layout_constraintBottom_toBottomOf="parent"
  app:layout_constraintEnd_toEndOf="parent"
  app:layout_constraintStart_toStartOf="parent"
  app:layout_constraintTop_toTopOf="parent" />
Cuối cùng là định nghĩa phương thức sendMessage() trong lớp MainActivity của tập tin MainActivity.java:
public void sendMessage(View view)
{
  if (!isBound) return;
  Message msg = Message.obtain();
  Bundle bundle = new Bundle();
  bundle.putString("MyString", "Message Received");
  msg.setData(bundle);
  try {
     myService.send(msg);
  } catch (RemoteException e) {
     e.printStackTrace();
  }
}
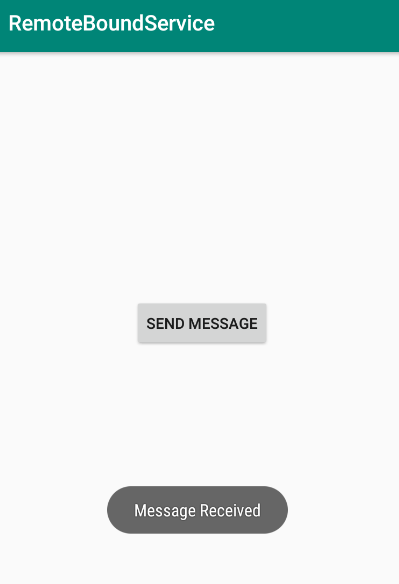
Lưu và thực thi ứng dụng. Kết quả khi nhấn nút Send Message:
Mã nguồn các dự án minh họa:
